


![SoftPro™ Chlorine+ Carbon Whole House Water Filter to Remove PFAS, Chlorine, Chloramine & Pesticides [City Water Filters Series]](http://softprowatersystems.com/cdn/shop/files/SoftPro_Whole_House_Carbon_Filter_with_Spin_Down_Water_Filter.webp?v=1783547361&width=140)


 855-683-8488


How to Replace an Iron Filter Control Valve Without a Plumber

Replacing an iron filter control valve without a plumber is something we can absolutely tackle ourselves and save hundreds in the process. We'll shut off the water, bypass the system, and depressurize the line before touching anything. Then we remove the old valve, thread in the new one, and reconnect every fitting carefully. A quick leak check and manual regeneration cycle confirms everything's working. Stick with us and we'll walk you through every step in detail.
Key Takeaways
- Rotate the bypass valve to the bypass position and open a nearby faucet to confirm the line is fully depressurized before starting.
- Remove the old control valve by disconnecting the bypass valve, turning the mounting nut counterclockwise, and lifting it straight off the tank.
- Inspect the tank's threaded opening for debris or corrosion before installing the new control valve to ensure a proper seal.
- Thread the new control valve clockwise by hand, snug it with a strap wrench, then reconnect all bypass, drain, and brine connections.
- Gradually crack open the bypass valve to repressurize the system, check all joints for leaks, and run a manual regeneration cycle.
Wrenches, Fittings, and Parts Required for Iron Filter Control Valve Replacement

Before we plunge into the replacement process, let's make sure we've got everything we need on hand. Gathering the right tools upfront eliminates frustrating mid-job trips to the hardware store.
Before diving in, gather every tool and part you need—mid-job hardware store runs kill momentum fast.
Here's what you'll need:
- Pipe wrenches (two, for counter-torquing connections)
- Adjustable wrench for bypass valve fittings
- Teflon tape and pipe thread sealant
- Replacement control valve (match your existing brand and tank diameter)
- Bypass valve assembly (if yours is damaged or outdated)
- Distributor tube (measure length before ordering)
- O-rings and seal kit specific to your valve model
Check your existing valve's manufacturer label before purchasing parts—compatibility matters enormously here. Using the wrong control valve creates leaks, poor backwash cycles, and premature system failure. Get it right the first time.
Shut Off Water and Depressurize the Iron Filter
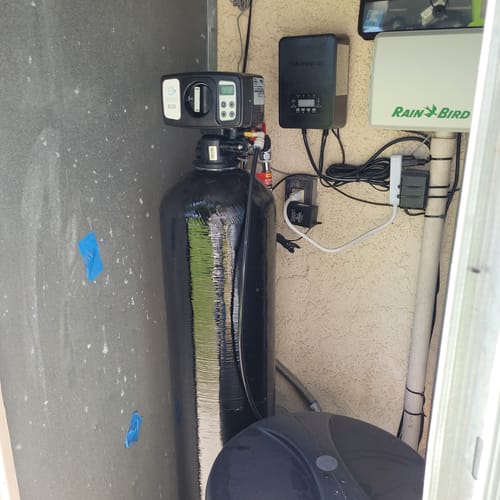
With our tools and parts staged and ready, we can get to work—and the first order of business is shutting off the water supply and relieving pressure from the system. Locate the bypass valve on the control head and rotate it to the bypass position, isolating the filter tank from the main line.
Next, open a nearby faucet to bleed residual pressure from the system—this step prevents a face full of water when we disconnect the valve. Once flow stops, it's confirmed the line is depressurized. Don't skip this step; working on a pressurized system risks damaging new components before installation even begins.
With water off and pressure relieved, we're now set up for a clean, controlled valve swap.
How to Remove the Old Iron Filter Control Valve
Now that the system is depressurized, we can safely remove the old control valve. Start by disconnecting the bypass valve from the control head—most models use a simple push-in connection that releases with a firm quarter-turn.
Next, locate the control valve's mounting nut where it connects to the mineral tank. Using a valve wrench or large strap wrench, turn counterclockwise to unthread it. This connection can be stubborn if it hasn't been serviced in years, so apply steady, controlled pressure rather than forcing it.
Once the valve breaks loose, lift it straight up and off the tank. Inspect the tank's threaded opening for debris or corrosion before proceeding. A clean connection point guarantees the new valve seats properly and prevents future leaks.
Install the New Control Valve and Secure Every Connection
Once the tank opening is clean and clear, we're ready to seat the new control valve. Thread it in by hand first, turning clockwise until you feel solid resistance. Don't force it—cross-threading here means starting over with a damaged tank.
Thread the new control valve in clockwise by hand until resistance confirms proper seating—never force it.
Once hand-tight, use a strap wrench to snug it down firmly. We're not torquing it into submission; we're creating a reliable seal.
Now reconnect the bypass valve, clicking or threading each port into position until it locks securely.
Reattach the drain line and any brine or backwash connections, confirming each fitting is snug and properly seated. A loose connection here creates iron-rich leaks that defeat the entire system. Double-check every joint before moving forward—precision now prevents costly callbacks later.
Test the Iron Filter for Leaks and Confirm It's Working
Before we turn the water back on, let's take a slow, methodical approach to pressurizing the system. Crack the bypass valve open gradually—don't rush it. Fast pressurization stresses fittings and masks leaks until they become problems.
Watch every connection point as pressure builds: inlet, outlet, drain line, and the valve body itself. Run your fingers across each joint and check for moisture. Even a slow seep will worsen under sustained pressure.
Once fully pressurized, initiate a manual regeneration cycle through the control valve's interface. This confirms the motor, timer, and internal pistons are functioning correctly. Watch the drain line for consistent flow during backwash.
If everything stays dry and the cycle completes cleanly, you've successfully replaced your iron filter control valve.
Frequently Asked Questions
How to Remove a Water Filter Valve?
To remove a water filter valve, we'll shut off the water supply, relieve pressure by opening a faucet, then unscrew the valve's fittings or bypass connections. We can now lift it free cleanly.
How Much Does It Cost to Replace a Control Valve on a Water Softener?
Replacing a water softener control valve typically costs $200–$500. The valve itself runs $100–$300, plus parts. We can save you $150–$300 by skipping the plumber and tackling this yourself!
What Is the Cheapest Way to Remove Iron From Well Water?
The cheapest way to remove iron from well water is with a basic iron filter, costing just $200–$500 installed. It's simple, effective, and delivers clean, iron-free water without breaking your budget.
How to Change Iron Filter Media?
To change iron filter media, we'll need to backwash first, then remove the control valve, extract old media, rinse the tank, and refill with fresh media before reinstalling the valve and testing water flow.


