


![SoftPro™ Chlorine+ Carbon Whole House Water Filter to Remove PFAS, Chlorine, Chloramine & Pesticides [City Water Filters Series]](http://softprowatersystems.com/cdn/shop/files/SoftPro_Whole_House_Carbon_Filter_with_Spin_Down_Water_Filter.webp?v=1783547361&width=140)


 855-683-8488


Iron Filter Control Valve Seal and O-Ring Replacement Guide

Replacing iron filter control valve seals and O-rings is a straightforward fix you can handle yourself. Most leaks trace back to dry, misseated, or incorrectly sized O-rings. You'll need replacement O-rings, silicone lubricant, a wrench set, and an inspection light. Shut off your water supply, relieve pressure, disassemble carefully, swap out the worn seals, and reassemble in reverse. There's plenty more to know about getting this repair done right the first time.
Key Takeaways
- Shut off the water supply, bypass the iron filter, and relieve system pressure completely before disassembling the control valve.
- Carefully disassemble the valve head while photographing each layer to ensure correct reassembly order.
- Remove worn O-rings, inspect grooves for debris or damage, then lubricate new seals with silicone grease before installation.
- Slowly restore water pressure after reassembly and manually trigger a regeneration cycle to confirm proper valve function.
- If leaks persist, check for incorrect O-ring sizing, poor seating, missed lubrication, debris in grooves, or a cracked valve housing.
Why Your Iron Filter Control Valve Is Leaking

When your iron filter control valve starts leaking, the culprit is almost always one of four things: a dry O-ring, poor O-ring seating, contamination in the O-ring groove, or the wrong size or material O-ring. Understanding which issue you're dealing with determines exactly how you'll fix it.
Before replacing anything, we recommend inspecting the valve seat and housing for cracks or physical damage. A compromised housing won't seal regardless of how perfect your O-ring is.
Next, check whether the existing O-ring dried out, shifted out of its groove, or collected debris that's preventing a proper seal.
Identifying the root cause upfront saves time and prevents repeat failures — something every serious DIYer wants to avoid.
What You Need to Replace Iron Filter Control Valve Seals
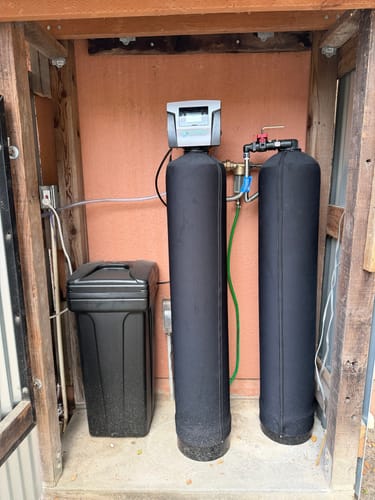
Getting everything together before you start makes this repair far smoother than scrambling mid-job with water dripping and parts spread across the floor. We've learned that missing one item mid-repair turns a 20-minute job into a frustrating hour.
| Item | Purpose | Key Detail |
|---|---|---|
| Replacement O-ring | Seals valve chamber | Verify size and material compatibility |
| Silicone lubricant | Protects O-ring during install | Never use petroleum-based grease |
| Inspection light | Reveals compression marks or cracking | Check old O-ring closely |
| Wrench set | Disconnects water and brine lines | Power off first |
| Manual regeneration access | Confirms successful repair | Trigger cycle post-installation |
Having these five essentials staged beforehand means we're diagnosing, replacing, and verifying without unnecessary interruptions slowing us down.
How to Replace Iron Filter Control Valve Seals
Before we crack open the valve, let's walk through the full replacement process so nothing catches us off guard.
Before we crack open the valve, let's walk through the full replacement process so nothing catches us off guard.
Replacing control valve seals isn't complicated—but sequence and attention to detail separate a clean repair from a frustrating callback.
- Shut off the water supply and bypass the iron filter completely
- Relieve system pressure before loosening any valve components
- Disassemble the valve head carefully, photographing each layer as you go
- Remove worn seals and O-rings, inspecting seats for scoring or corrosion
- Lubricate new seals with silicone grease, then reassemble in reverse order
We're not just swapping rubber—we're restoring precision to a system that protects our water quality. Done right, this repair extends valve life substantially and prevents the iron breakthrough that ruins everything downstream.
How to Test Your Iron Filter Control Valve After the Repair
With the valve reassembled, it's time to put our work to the test—and this step matters just as much as the repair itself. Slowly restore water pressure and watch every connection point for drips. Even a minor weep signals a misaligned seal or an undertightened fitting.
Next, manually trigger a regeneration cycle and listen—does the valve cycle through each stage cleanly without hesitation or backflow? Check your bypass valve too; it should switch smoothly between positions. Finally, run water from a downstream tap and confirm you're getting strong, consistent flow. If everything holds under pressure and cycles correctly, we've done the job right. Any anomaly here is valuable feedback—don't ignore it. Precision now prevents a far costlier failure later.
Why Your New Iron Filter Valve Seal Is Still Leaking
Sometimes the test reveals a frustrating truth: the valve still leaks even after a fresh seal installation. Don't panic—we've seen this before, and there's always a reason. Let's diagnose it together.
Here's what's likely working against you:
- You skipped the silicone lubricant—a dry O-ring never seals properly, no matter how carefully you installed it
- The O-ring isn't seated correctly—even slight misalignment destroys the seal
- Debris or rust contaminated the groove—invisible grime silently sabotages everything
- You used the wrong O-ring size or material—close isn't good enough here
- The valve seat or housing is cracked—no O-ring overcomes damaged hardware
Identify which culprit applies, correct it precisely, and retest immediately.
Frequently Asked Questions
How Often Should a Pool Filter O-Ring Be Replaced?
We recommend replacing your pool filter o-ring annually, though you'll want to inspect it more frequently if you notice wear, cracking, or leaking. Proper water chemistry and usage patterns can also affect how often it needs replacing.
How Often Should I Replace the O-Ring on My Water Filter?
We recommend replacing your water filter's o-ring every 1-5 years, depending on usage and water conditions. We'd also suggest inspecting it regularly for cracks, compression, or wear to determine if earlier replacement's needed.
How to Put an O-Ring on a Filter?
We'll coat the new O-ring with silicone lubricant, then carefully press it into the groove, ensuring it's seated evenly all around. Reassemble slowly, restore water supply, and inspect for leaks immediately.
How to Stop an O-Ring From Leaking?
We'll stop an O-ring from leaking by inspecting it for cracks, replacing it with the correct size, coating it with silicone lubricant, and ensuring it's properly seated without any twisting.


